Canva File Compressor Tips: Lighter PNG, JPG and PDF Exports
Make design exports lighter for clients, websites and social posts while keeping text sharp.
Read guideFile reducer MP4 compression starts with a simple question: how small does the clip need to be? Email services, chat apps and upload forms all set their own limits, and once you know the target, choosing the right resolution and bitrate becomes a matter of quick arithmetic rather than trial and error.
This walkthrough shows how to estimate a final size, pick settings for common destinations and reduce the clip in the File Reducer video compressor, plus what to do when your browser saves WebM instead of MP4.
Video size follows a dependable formula: total bitrate multiplied by duration. Add the video bitrate and the audio bitrate in kilobits per second, multiply by the length in seconds and divide by 8,000 to get megabytes. A one-minute clip at 1,000 kbps video plus 96 kbps audio comes to about 8.2 MB.
Working backwards is just as easy. Divide your size limit in megabytes by the clip length in seconds, multiply by 8,000 and subtract the audio rate. The answer is the highest video bitrate that still fits, and the closest preset at or below it is the one to choose.
| Video bitrate preset | 30-second clip | 1-minute clip | 3-minute clip |
|---|---|---|---|
| 4 Mbps (High) | About 15 MB | About 31 MB | About 92 MB |
| 2 Mbps (Medium) | About 8 MB | About 16 MB | About 47 MB |
| 1 Mbps (Small) | About 4 MB | About 8 MB | About 25 MB |
| 0.5 Mbps (Smallest) | About 2 MB | About 4.5 MB | About 13 MB |
The figures include audio at 96 kbps. Removing audio lowers each one slightly, and real encoders can land a little above or below the target.
Bitrate and resolution work as a pair. A low bitrate spread over a large 1080p frame produces smeared detail and blocky motion, while the same bitrate on a 720p or 480p frame looks clean, because each pixel gets more data.
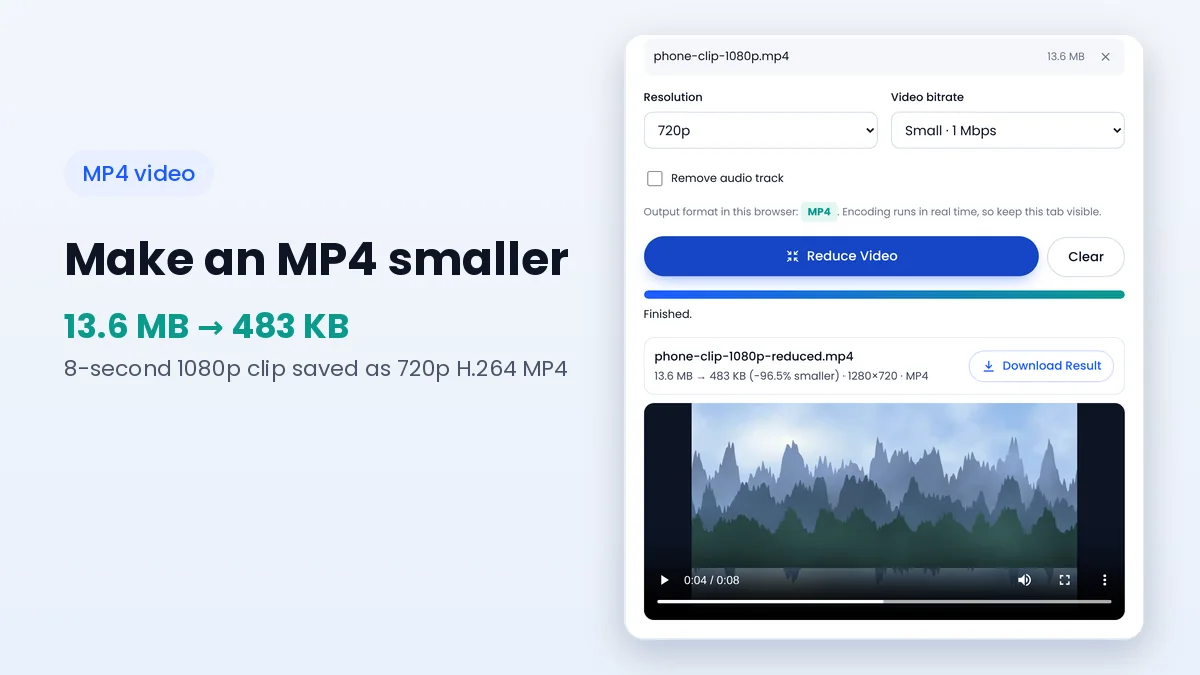
Open the Video tab and add your MP4. The panel shows the output format your browser can record before you start. Choose a resolution and bitrate based on your estimate, and tick Remove audio if the clip does not need sound.
Press Reduce Video and keep the tab visible while the progress bar moves, since encoding runs at normal playback speed. When it finishes, check the new size against your limit, play a few seconds in the preview and download the result.
Many email services cap attachments somewhere around 20–25 MB, and chat apps, learning platforms and job portals often have their own limits that change over time. Check the current limit on the service itself, then aim a little below it to leave room for small variations.
Large files sent through some services are converted into cloud links or compressed again by the app. Reducing the clip yourself first gives you control over how it looks.
The output format depends on your browser's recorder. Recent Chrome, Edge and Safari versions can record MP4, while other browsers create WebM files. Both play in current browsers and most modern players.
If a website accepts only MP4, open File Reducer in a browser that records MP4 and run the compression again. The format label in the Video tab confirms which one you will get before any time is spent encoding.
File Reducer does not trim or split videos. When a long recording cannot fit a strict limit at any acceptable quality, cutting it into shorter parts with a video editor first is the most reliable solution.
Imagine a 2-minute phone clip of 180 MB that must go into an email with a 20 MB limit. Aiming for 18 MB leaves a margin. Dividing 18 by 120 seconds and multiplying by 8,000 gives a total of 1,200 kbps, and subtracting 96 kbps of audio leaves about 1,100 kbps for the picture.
The Small preset at 1 Mbps fits that budget, and 720p is the natural resolution partner for it. The estimated result is around 16 MB, comfortably under the limit, with enough bitrate to keep a typical phone clip looking clean on a laptop or phone screen.
Screen recordings contain large areas that barely change between frames, so they compress very efficiently and often look sharp even at the Small preset. Text needs enough resolution to stay readable, so keep them at 720p or above whenever possible.
Camera footage with handheld movement, water, leaves or crowds changes constantly from frame to frame. These scenes need more bitrate to avoid blocky patches, so choose Medium or lower the resolution when the size budget is tight.
Play the reduced file in the preview before downloading it. Look at faces, text and fast movement, since these show compression problems first. If the clip looks fine, compare the new size with your limit and download it; if not, try the next preset up and lower the resolution one step to stay inside the budget.
Keep the original recording until the reduced copy has been delivered and opened successfully. A second attempt from the original always looks better than compressing an already reduced MP4 again.
File reducer MP4 compression becomes predictable once you work out the size budget: bitrate times duration tells you which preset fits, and the resolution should match that bitrate. Aim slightly below the destination's limit and check the preview before sending.
Open the video compressor to try it with your own clip, and see how browser video compression works for a closer look at what happens during encoding.
Keep learning how to make images, PDFs and videos smaller.
Make design exports lighter for clients, websites and social posts while keeping text sharp.
Read guideThe real reasons files resist compression, and the settings that make the biggest difference.
Read guideQuality values, resizing and target-size mode explained for photos that need to fit an upload limit.
Read guide